3D Model Loading

vuex实现历史记录

2021年01月25日 技术分享>前端技术 , , ,
本站文章除注明转载外,均为原创文章。如需转载请注明出处:
https://kwokronny.top/202101/vuex-develop-history/

最近自研着一个可视化操作平台,其中涉及到用户操作后可撤销或重做,在网上搜了一些解决思路,完善自己所设想的解决思路。

历史记录需求的要点

  • 可存储在 localStorage 中
  • 可多次撤销或多次重做
  • 点击列表中的一项,将历史倒退或前进至指定位置

看似简单的需求,在基础建设设计上的错误,亦会在未来导致更多的工作量。所以结合上面两点的要求,发现 vuex 的基本思路非常适合完成这个需求,redux 同样。

实现思路

此项目用了 typescript 来加强代码的严谨性,方便日后维护,大家简单看个思路。

1. 先定义历史记录的数据结构

vue.d.ts
1
2
3
4
5
6
7
8
9
10
11
12
13
interface HistoryItem {
timestrap: number; // 记录时间戳
name: string; // 记录名称
redo: string; // 重做Mutation
undo: string; // 撤销Mutation
redoParams: any[]; // 重做Mutation提交参数
undoParams: any[]; // 撤销Mutation提交参数
}

interface HistoryStatus {
historys: HistoryItem[]; // 记录history数组
_currentHistory: number; // 当前节点索引
}

2. 编写 History 状态模块

编写基础操作history状态的vuex module,创建记录的Mutation,重做和撤销的Action

一条记录是包含对这个步骤的执行
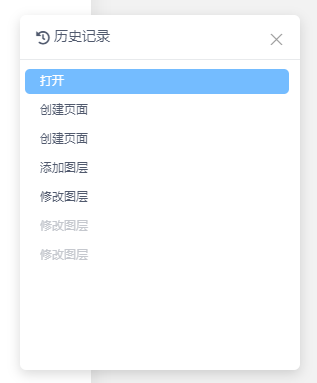
redo操作与撤销undo操作的。所以在用户点击列表其中一项时,应该是循环回退到当前项的前一项undo,或循环redo到当前项
所以需要增加一条空记录,方便用户点击空记录撤销最初的操作。

运用了vuex-module-decorators 装饰器,写更易维护的代码

store/modules/History.ts
1
2
3
4
5
6
7
8
9
10
11
12
13
14
15
16
17
18
19
20
21
22
23
24
25
26
27
28
29
30
31
32
33
34
35
36
37
38
39
40
41
42
43
44
45
46
47
48
49
50
51
52
53
54
55
56
57
58
59
60
61
62
63
64
65
66
67
68
69
70
71
72
73
74
75
76
77
78
79
80
81
82
83
84
import { VuexModule, Module, Mutation, Action } from "vuex-module-decorators";

@Module({ namespaced: true })
export class HistoryModule extends VuexModule<HistoryStatus> implements HistoryStatus {
/**
* 初始化一个空记录的原因主要是方便列表操作时:
* 当用户点击最早的一条记录时,可以正常撤销用户操作的第一步
**/
public historys: HistoryItem[] = [
{
name: `打开`,
timestrap: Date.now(),
redo: "",
redoParams: [],
undo: "",
undoParams: [],
},
];
public _currentHistory: number = 0;

// getter
get current(){
return this._currentHistory;
}

// getter
get historyList(): HistoryItem[] {
return this.historys || [];
}

// 创建历史记录
@Mutation
public CREATE_HISTORY(payload: HistoryItem) {
if (this._currentHistory < this.historys.length - 1) {
this.historys = this.historys.slice(0, this._currentHistory);
}
// 由于js的深浅拷贝问题,所以在创建时都需要对数据进行深拷贝
// 想尝试lodash的clone函数,但发现好像JSON.stringify的方式clone应该更快的,毕竟我们的数据不存在函数
// 我这里就先不改了,主要是表达出思路即可
this.historys.push(_.cloneDeep(payload));
this._currentHistory = this.historys.length - 1;
}

@Mutation
public SET_CURRENT_HISTORY(index: number) {
this._currentHistory = index < 0 ? 0 : index;
}

// 重做
@Action
public RedoHistory(times: number = 1) {
let { state, commit } = this.context;
let historys: HistoryItem[] = state.historys;
let current: number = state._currentHistory;
if (current + times >= historys.length) return;
while (times > 0) {
current++;
let history = historys[current];
if (history) {
commit(history.redo, ...history.redoParams, { root: true });
}
times--;
}
commit("SET_CURRENT_HISTORY", current);
}

// 撤销
@Action
public UndoHistory(times: number = 1) {
let { state, commit } = this.context;
let historys: HistoryItem[] = state.historys;
let current: number = state._currentHistory;
if (current - times < 0) return;
while (times > 0) {
let history = historys[current];
if (history) {
commit(history.undo, ...history.undoParams, { root: true });
}
times--;
current--;
}
commit("SET_CURRENT_HISTORY", current);
}
}

3. 编写可以撤销或重做的功能

完成上面两步后,我们就可以编写各种操作了

  1. 编写对数据基础操作的Mutation

    1
    2
    3
    4
    5
    6
    7
    8
    9
    10
    11
    12
    13
    14
    @Mutation
    public CREATE_PAGE(payload: { page: PageItem; index: number }) {
    this.pages.splice(payload.index, 0, _.cloneDeep(payload.page));
    this._currentPage = this.pages.length - 1;
    }

    @Mutation
    public REMOVE_PAGE(id: string) {
    let index = this.pages.findIndex((p) => p.id == id);
    index > -1 && this.pages.splice(index, 1);
    if (this._currentPage == index) {
    this._currentPage = this.pages.length > 0 ? 0 : -1;
    }
    }
  2. 将基础操作按要求封装成带保存->记录->执行的Action

    store/modules/Page.ts
    1
    2
    3
    4
    5
    6
    7
    8
    9
    10
    11
    12
    13
    14
    15
    16
    17
    18
    19
    20
    21
    22
    23
    24
    25
    26
    27
    28
    29
    30
    // 包装创建页面函数
    @Action
    public CreatePage(type: "page" | "dialog") {
    let { state, commit } = this.context;

    // 记录保存即将创建的页面
    let id = _.uniqueId(type) + Date.now();
    let pageName = pageType[type];
    let page: PageItem = {
    id,
    name: `${pageName}${state.pages.length + 1}`,
    type,
    layers: [],
    style: { width: 720, height: 1280 },
    };

    //创建历史记录
    let history: HistoryItem = {
    name: `创建${pageName}`,
    timestrap: Date.now(),
    redo: "Page/CREATE_PAGE",
    redoParams: [{ index: state.pages.length - 1, page }],
    undo: "Page/REMOVE_PAGE",
    undoParams: [id],
    };
    // 保存记录此历史记录
    commit("Histroy/CREATE_HISTORY", history, { root: true });

    commit(history.redo, ...history.redoParams, { root: true });
    }
store/modules/Page.ts
1
2
3
4
5
6
7
8
9
10
11
12
13
14
15
16
17
18
19
20
21
@Action
public RemovePage(id: string) {
// 记录保存现场状态
let index = this.pages.findIndex((p) => p.id == id);
if (index < 0) return;
let page: PageItem = this.context.state.pages[index];

//创建历史记录
let history: HistoryItem = {
name: `删除 ${page.name}`,
timestrap: Date.now(),
redo: "Page/REMOVE_PAGE",
redoParams: [id],
undo: "Page/CREATE_PAGE",
undoParams: [{ page, index }],
};

// 保存记录此历史记录
this.context.commit("Histroy/CREATE_HISTORY", history, { root: true });
this.context.commit(history.redo, ...history.redoParams, { root: true });
}

以上,撤销与重做的功能就基本完成了

4. 使用

1. 我们现在只需要在使用时创建或删除页面时使用封装的`Action`后

1
2
3
4
5
6
7
private create(type: "page" | "dialog") {
this.$store.dispatch("Page/CreatePage", type);
}

private remove(id: number) {
this.$store.dispatch("Page/RemovePage", id);
}
2. 配置全局热键
App.vue
1
2
3
4
5
6
7
8
9
10
11
...
private mounted() {
let self = this;
hotkeys("ctrl+z", function (event, handler) {
self.$store.dispatch("History/UndoHistory");
});
hotkeys("ctrl+y", function (event, handler) {
self.$store.dispatch("History/RedoHistory");
});
}
...

效果